How to Clean a Dog’s Ears: A Gentle, Vet-Guided Home Routine
Cleaning a dog’s ears is not a task every dog needs on a fixed schedule. Healthy ears may need no cleaning at all. The safest approach is to check your dog’s ears, clean only when there is a reason or your veterinarian recommends it, and stop if you notice pain, irritation, discharge, or an unusual change. When cleaning is appropriate, use a dog ear cleaner recommended by your veterinarian and follow its directions rather than trying to flush or scrub the ear yourself.
This guide explains how to inspect an otherwise comfortable, normal-looking ear, prepare for a gentle cleaning, and recognize when home care should wait for a veterinary examination.
Check the ears before reaching for the cleaner
Start with a quiet visual check. In a comfortable dog, gently lift the ear flap only as far as your dog allows and look at the visible part of the ear. You do not need to probe the canal, remove every trace of wax, or make the ear look perfectly bare.
A little visible wax or debris does not automatically mean that an ear needs a deep clean. Some dogs need occasional cleaning, while others rarely need it. Your veterinarian can help you decide whether your dog’s ears need routine attention and what product, if any, is appropriate.
When a visual check is enough
If the ear looks normal for your dog, has no unusual odor or discharge, and your dog is comfortable when the flap is touched, inspection may be all that is needed. Avoid cleaning simply because a calendar reminder says it is time. Unnecessary or overly frequent cleaning can irritate the ear.
When not to clean at home
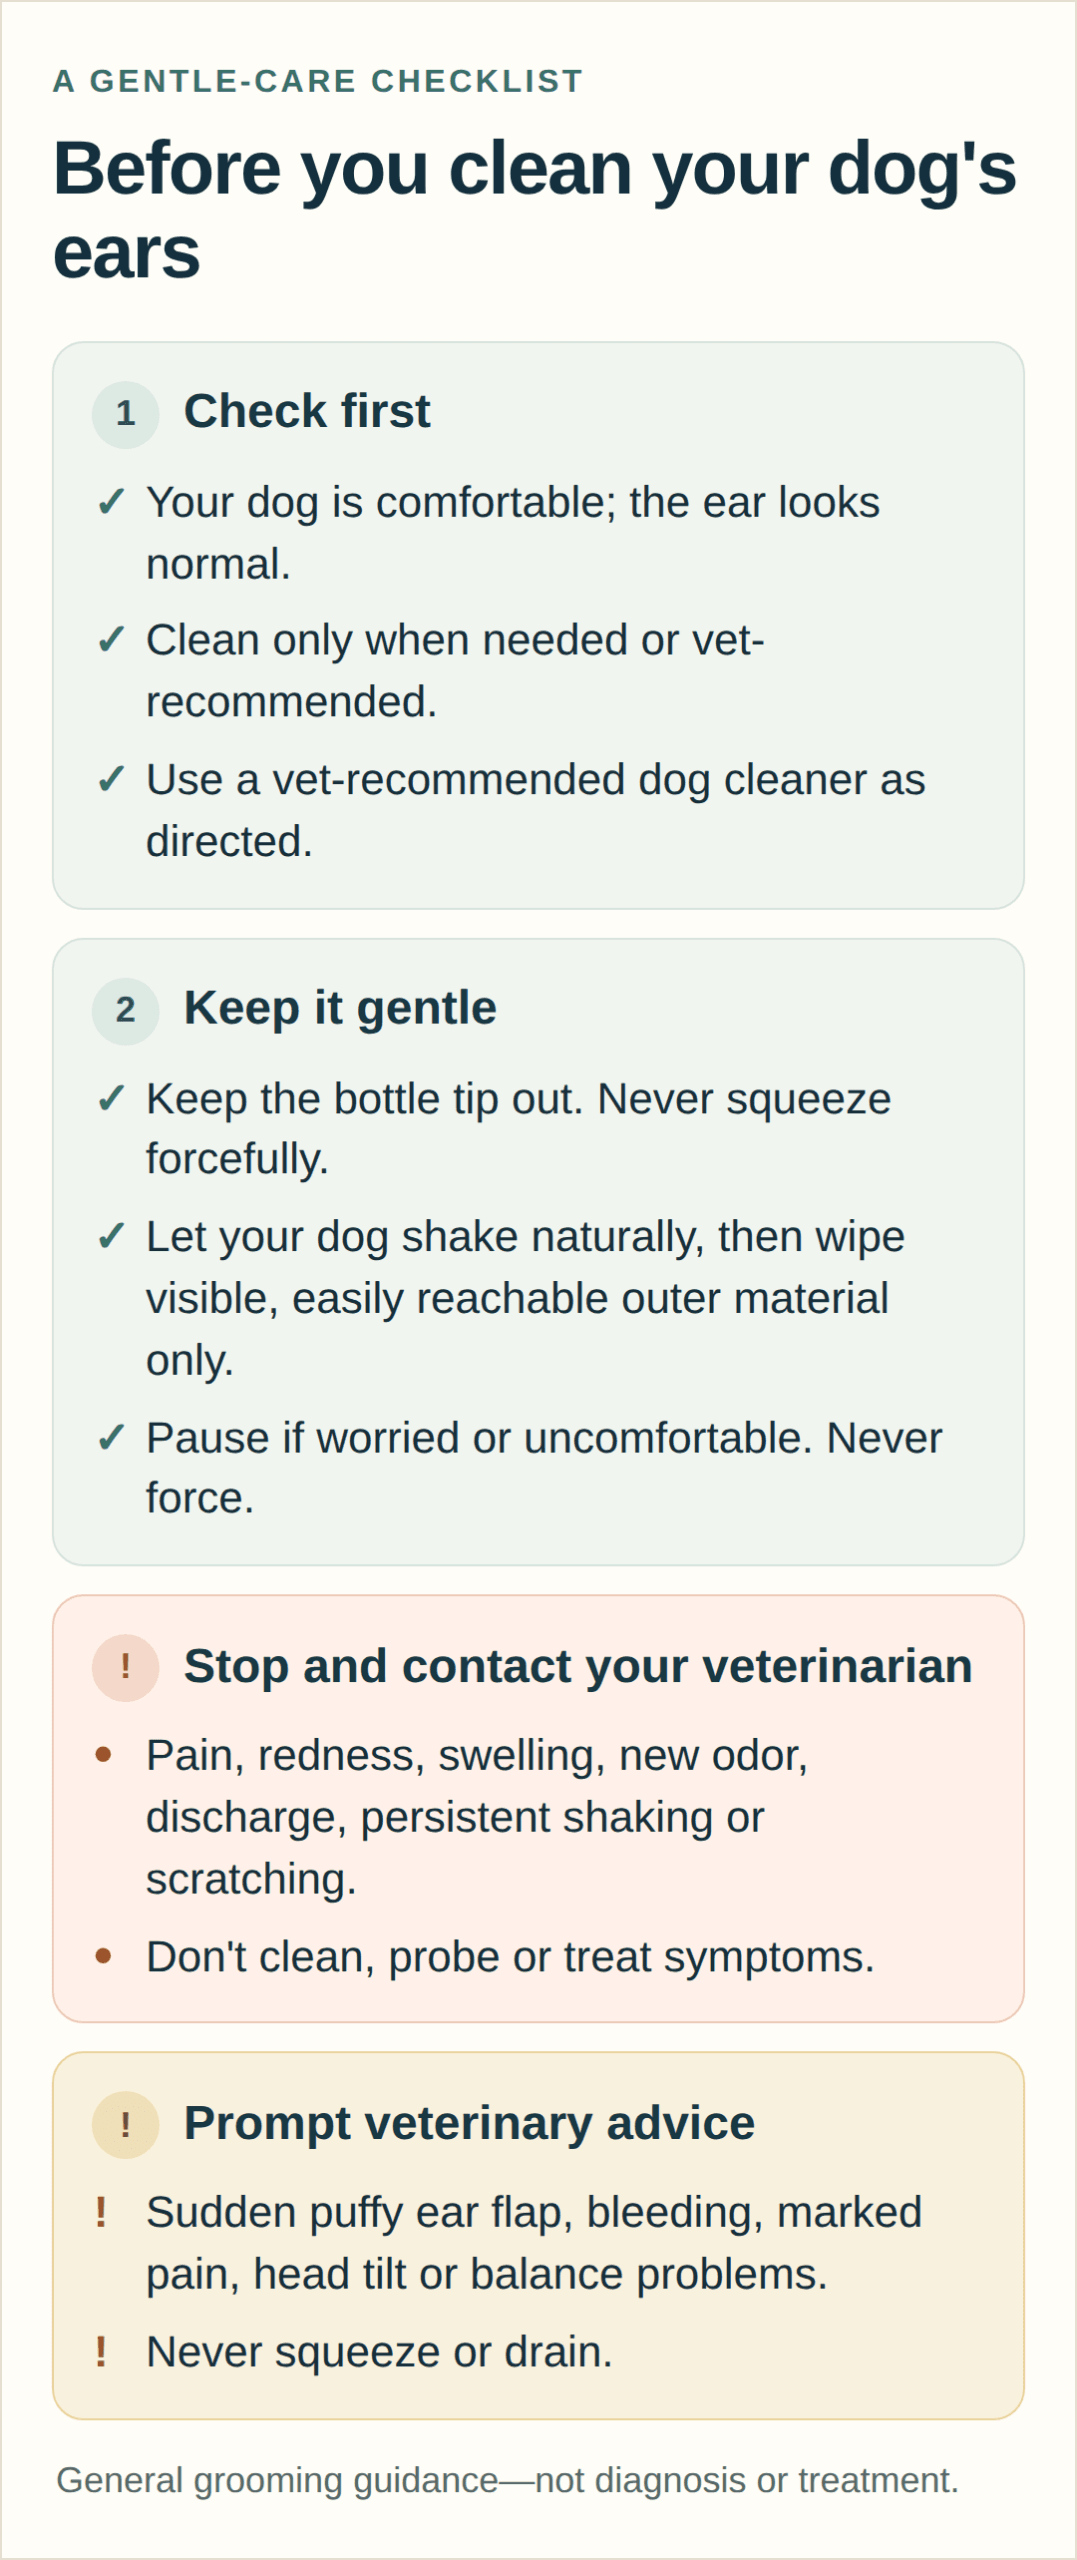
Do not start a home cleaning if you notice a new or unpleasant odor, redness, swelling, tenderness, pain, discharge, increased wax or debris, persistent head shaking, repeated scratching, or discomfort when the ear is touched. These signs need veterinary advice; they are not a reason to clean deeper or more forcefully.
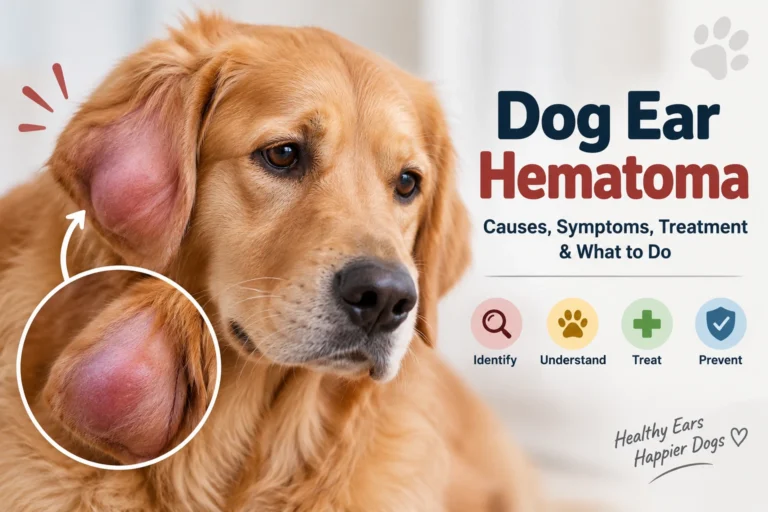
Contact your veterinarian promptly if the ear flap suddenly becomes puffy or swollen, there is bleeding, your dog has marked pain, the head is tilted, balance seems affected, or the change is abrupt or severe. Do not squeeze, drain, probe, or try to treat a swollen or painful ear yourself.
These signs do not tell you the cause. An ear problem needs an examination to determine what is happening and what care is appropriate. The VCA instructions for cleaning dogs’ ears explain that painful or abnormal ears should be assessed rather than treated as a routine cleaning task. Cornell’s guide to cleaning a dog’s ears also emphasizes checking the ears and recognizing when veterinary help is needed.
Gather a few simple supplies
If your veterinarian has advised routine cleaning and your dog’s ears look comfortable and normal, prepare everything before you begin. Having supplies close by helps keep the process calm and avoids leaving your dog waiting while you search for something.
You will need:
- A dog ear-cleaning solution recommended by your veterinarian.
- Cotton balls or soft gauze for wiping the visible ear flap and opening.
- A towel to catch drips or contain a little mess.
- Small treats your dog enjoys, if your dog is comfortable taking them.
Use the cleaner according to its label and your veterinarian’s directions. If you are unsure whether a product is suitable, ask before using it. Do not substitute household mixtures or products intended for another purpose.
A gentle, step-by-step ear-cleaning routine
Only follow these steps when your dog is comfortable and the ear appears suitable for routine cleaning. If your veterinarian has shown you a different method for your dog, follow that individualized instruction.
1. Choose a calm, steady place
Pick a quiet area with a non-slip surface. Let your dog stand or sit in a position that feels natural. Keep the towel, cleaner, gauze or cotton, and treats within reach.
Avoid chasing your dog, cornering them, or trying to begin while they are already frightened or struggling. A calm start is more useful than trying to finish quickly.
2. Let your dog settle into the handling
Approach from the side and allow your dog to see and sniff what you are holding. If your dog is comfortable, gently touch the outside of the ear and briefly lift the flap. Reward relaxed cooperation.
You do not need to hold the head rigidly or force the ear open. If your dog pulls away, stiffens, or seems uncomfortable, pause. The aim is gentle care, not getting through a checklist at any cost.
3. Apply the cleaner as directed
Read the product instructions before starting. Apply the veterinarian-recommended cleaner in the manner specified on its label or demonstrated by your veterinarian. Keep the bottle tip out of the ear canal; do not insert it or forcefully squeeze liquid into the ear.
If your dog will not tolerate the application, stop. Do not restrain your dog or improvise a different way to get liquid into the canal. Ask your veterinarian to demonstrate a suitable method or help you plan a more comfortable approach.
4. Massage only if your dog is comfortable
If the cleaner’s directions call for it and your dog accepts the touch, gently massage the base of the ear. VCA describes a brief, gentle massage as part of its ear-cleaning instructions. Keep your touch light and stop if your dog shows discomfort.
Do not press hard, knead the ear, or continue because you think more massage will make the cleaning more effective. Your dog’s comfort and the product directions should guide this step.
5. Allow a natural head shake
Some dogs shake their heads after cleaner is applied. If your dog does so naturally, allow room for the movement and use the towel to catch splashes. Do not hold the head still to prevent a shake.
If shaking becomes persistent or seems linked to pain or distress, stop the cleaning and contact your veterinarian rather than repeating the process.
6. Wipe only what you can comfortably see
Use a cotton ball or soft gauze to wipe loosened debris from the visible ear flap and the entrance of the ear. Keep your finger at the outer opening and do not push inward. Never reach down the canal to try to remove material you cannot easily see or touch.
The goal is to remove accessible residue, not to make the canal completely bare. Do not scrape, dig, or keep wiping when the visible area is clean or your dog is no longer comfortable.
Make ear handling easier over time
Some dogs accept ear care readily; others need time to become comfortable with having their ears touched. If your dog is wary, practice the handling separately from cleaning rather than making the first experience a full ear-cleaning session.
Begin with a brief touch to the shoulder or side of the head, then gradually work toward touching the outside of the ear. Reward calm, voluntary participation. If your dog remains relaxed, you can later practice briefly lifting the flap or showing the cleaning supplies without applying anything.
VCA’s guidance on dog behavior and training during ear cleaning describes signs that a dog may be uncomfortable, including becoming stiff, fidgeting, leaning away, or refusing treats. Wide eyes, attempts to grab treats, growling, or snapping are also reasons to stop rather than press on.
Keep practice short and end while your dog is still comfortable. Do not hold your dog down, corner them, scruff them, punish them, or continue through fear or pain. If handling remains difficult, ask your veterinarian for help. You can also read our guide to making grooming less stressful for anxious dogs.
How often should you clean your dog’s ears?
There is no universal daily, weekly, or every-other-week schedule that suits every dog. Some dogs’ ears need occasional cleaning, while healthy ears may need none. The right approach depends on your individual dog and your veterinarian’s advice.
Ask your veterinarian whether your dog needs routine cleaning, what signs should prompt a check, and which cleaner and method are appropriate. Avoid adding extra cleaning sessions just because you see a small amount of ordinary wax or because you want the canal to look spotless. Over-cleaning can irritate the ear.
If your veterinarian has recommended a routine, follow the plan they gave you rather than replacing it with a general schedule from an online article.
After swimming or bathing
Water exposure may make you think an ear needs immediate cleaning, but do not automatically pour cleaner into the canal after every bath or swim. Ask your veterinarian whether your dog needs a specific after-water routine.
You can gently towel-dry the outside of the ear flap if it is wet. Do not direct bath or shower water into the ear opening, push cotton or gauze down the canal, or use a drying product unless your veterinarian has specifically recommended it.
If your dog develops discomfort, unusual odor, discharge, repeated shaking, or other changes after water exposure, stop home cleaning attempts and seek veterinary advice.
Common ear-cleaning mistakes to avoid
A few well-intentioned habits can make ear care less comfortable or less safe.
Reaching into the canal with cotton swabs
Do not use cotton swabs or Q-tips to clean down the ear canal. They can push material inward and make it difficult to judge how far you are reaching. Use cotton balls or soft gauze only on the visible outer area.
Scraping or trying to remove every bit of wax
The goal is not a perfectly bare canal. Do not scrape, dig, or repeatedly wipe to remove material that is not easily accessible. If you see more debris than usual, ask your veterinarian whether the ear needs an examination.
Using household recipes or unsuitable products
Do not use alcohol, peroxide, vinegar, oils, essential-oil mixtures, soap, or homemade cleaning recipes in the ear. Do not flush the canal with water or use a product intended for another purpose. Use only a dog ear cleaner your veterinarian has recommended, following its directions.
Forcing liquid into the ear
Do not insert the bottle tip or squeeze with force. If your dog resists the application, stop and ask your veterinarian to demonstrate a method that is appropriate for your dog.
Cleaning despite warning signs
Odor, redness, swelling, pain, discharge, persistent shaking, or repeated scratching are reasons to seek veterinary advice, not reasons to clean more thoroughly. A home cleaning cannot determine what is causing those changes.
Turning cleaning into a struggle
Holding a dog down or continuing while they are frightened can make future handling harder and may put both of you at risk. Pause, reduce the difficulty, and ask for help if your dog cannot tolerate the process.
Questions to ask your veterinarian
If you are unsure whether your dog needs ear cleaning, a short conversation with your veterinarian can make the routine clearer. Consider asking:
- Do my dog’s ears look healthy, or is an examination needed before cleaning?
- Does my dog need routine cleaning at all?
- Which dog ear cleaner should I use, and what label directions should I follow?
- Can you demonstrate how to apply it and show me which visible areas I may wipe?
- What changes should make me stop cleaning and call the clinic?
- Does my dog need a different plan after swimming or bathing?
These questions help turn general grooming advice into a plan suited to your dog. If the ear is painful or visibly abnormal, arrange an examination rather than trying to clean it first.
A gentle routine starts with knowing when to stop
For a comfortable dog with normal-looking ears, begin with inspection and clean only when needed or recommended by your veterinarian. Use an appropriate dog ear cleaner, follow its directions, wipe only the visible outer area, and keep the experience calm. Never probe the canal or force the process.
If you notice pain, odor, redness, swelling, discharge, persistent shaking, or another unusual change, stop and seek veterinary advice. Good ear care is not about cleaning as often or as deeply as possible. It is about knowing when a simple check is enough, using a gentle method when cleaning is appropriate, and leaving medical concerns to your veterinarian. For a broader companion resource, see our dog hygiene guide.